Arizona is home to some of the most challenging hiking trails in all of North America. We have a series of hikes that begin at sea level and reach heights of over 10,000 feet. It is home to the Grand Canyon, a famous hiking spot that is one of the most visited locations on the planet. What are some of the most challenging trails in Arizona?
Before taking off into the otherworldly terrain of Arizona, you should know that not all the hikes will be completed in a single day. For longer hikes in Arizona, you could see more than 10 miles on a single leg. Even the easy trails have hikers in need of medical rescue. Read on and learn about Arizona’s hardest hiking trails.
- Superstition Ridgeline Hike
- Bright Angel Trail
- Brown’s Peak Trail
- Echo Canyon on Camelback Mountain
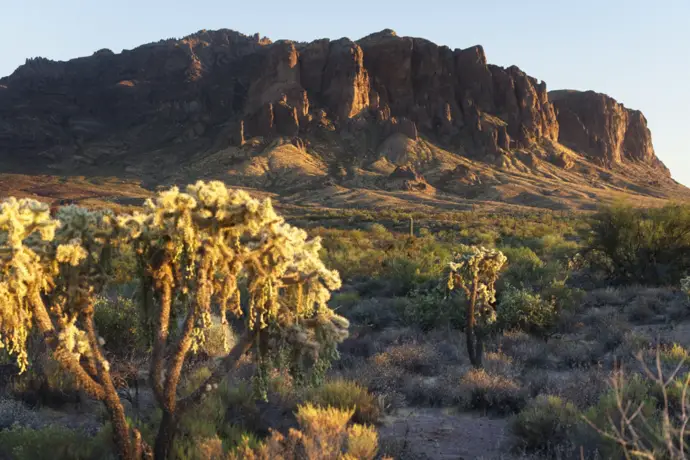
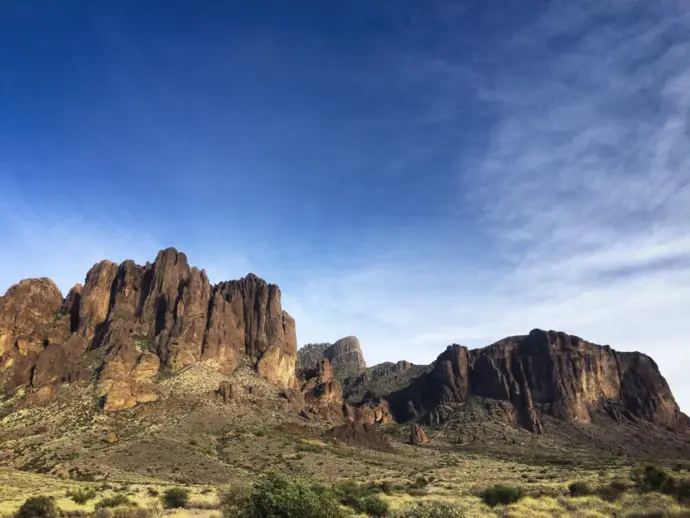
The Superstition Ridgeline Hike is One of the Toughest in All of Arizona
If you are thinking about tackling this 11.5-mile out and back, it is best to remember to follow the cairns. A cairn is a shape of stones made to mark the path. This hike is challenging because the trail can be hard to follow, and there is little or no shade. Don’t plan on hiking this one in the summertime without at least 6 liters per person and expect to travel for around 10 to 12 hours.
Though unprepared people can tackle this trail, it isn’t advised as even the most rugged backpacker has been hemmed up by the cliffs and needed assistance from the rescue squad. Expect some light jumping and steep inclines before you reach the massive payoff of a 360-degree unobstructed view of the Superstitions.
The obstacles you can expect on the Superstition Ridgeline hike are:
- No shade
- No access to water
- 11.5 mile
- Overgrown underbrush
- Loose rocks on inclines
- Bouldering
- Climbing
- Lose track of the trail
How to Thrive on the Superstition Ridgeline Trail
Conquering Superstition Ridgeline will take time and effort. The mileage is close to a half marathon, so preparing by going upwards of 11.5 miles on steady hills, some bouldering, and climbing will be the place to start. Keep pace comfortable and leaned slightly forward; if walking with a heavy pack, the lower legs will suffer if there isn’t some stretching and training before you take off.
Water is going to be crucial on this trail. Sacrifice amenities for a few more liters of water. Camping gear is notoriously easy to pack and exceptionally light. It is solid. Water is not. That means when you swap load-out for water, expect a more uneven pace as the water could slosh around if in a large container. Superstition is the perfect place for a Camelbak.
Some tips to help you conquer the Superstition Ridgeline are:
- Break it down – Breaking the hike into several different attempts is the best way to train for this. Only experience on the terrain will improve your ability to adapt to what it has to offer. The Superstitions are a series of trails, and Ridgeline is just one of many. Try a few others before jumping in with both feet.
- Watch the weather – Storms and rain are a severe threat to hikers on Superstition Ridgeline. Flooding can also be a problem for some trails. Choose perfect conditions, early in the morning in the fall or winter, to stave the heat enough to make the journey. Cool-weather means less sweat and a better ability to control hydration.
- Heavy pack squats – You aren’t going to be able to complete this mammoth of a trail unless you do some serious squats with a heavy backpack or rucksack. Take your regular pack and along with your equipment, pack some extra weights, plates if you have them, and do several sets of squats. Shoot for 12 to 15 reps during each set.
- Go with a group – Superstition Ridge is one of the most heavily trafficked trails in all of Arizona. Taking a group will mean that there are people for support and call or radio for help in an emergency. It is never recommended to take a hike alone; always find a buddy to go with you.
Bright Angel Trail Seems Easy but Has Hidden Dangers
Bright Angel trail is part of the Grand Canyon. That means it is one of the most heavily trekked spots on the globe at any time. The National Parks Service has done an excellent job of having several locations for the hikers to get water, but hikers still show up unprepared and have to be airlifted from the scene. The water pipes running the length of the canyon are a modern marvel.
The sneaky thing about Bright Angel is that the way the terrain works makes the hike like walking in an aquarium with intense light. The heat inside the canyon walls could be up 20 to 30 degrees warmer than the temperature above. Always carry enough supplies for an emergency and use maps and GPS to call your location to medical authorities should you need them.

Things to prepare for when you head out on the Bright Angel trail are:
- Extreme heat
- Extreme cold
- Eating on the trail
- Water for every hiker
- Watch for mules on the path
- 18.4 miles from Bright Angel Trail to Bright Angel Campground and River Trail
Tips for Making Bright Angel Trail a Breeze
Heat is the big thing to deal with on this one. The rapid increase in warmth as you descend from the peaks cannot be controlled, but it can be combated. There are cooling towels that can be stored in your pack and rotated in and out to keep the heat down. Wearing cool, loose clothing in addition to these towels can bring a bit of comfort for the hiker.
Water is always the key when it comes to hiking in the Grand Canyon. The rapid rise and fall in elevation take a toll on the joints and lead to tightening or cramps. With an additive like Tailwind, water can prevent this and get some much-needed electrolytes inside the body. Keep sipping throughout the trek for the best results. Gulping sends water to the belly, not where it is needed.
Some ways to prepare yourself before tackling Bright Angel Trail are:
- Hit the sauna – Getting your body adapted to rapid changes in heat and humidity is a great place to start. The ability to know when you are close to dehydration while on the trail is critical. Taking a few sweat sessions inside a sauna after a brisk hike, still in all your hiking gear, will be worth the pain and suffering.
- Sprints – Sprints when hiking are very similar to training for a short race. Go at your average pace for a minute, then walk as fast as you can for 30 seconds. Repeat this as many times as are needed to match the mileage of the trail. Sprints improve cardiovascular health and allow the hiker to breathe more comfortably during exercise.
- Walking lunges – One of the best bodyweight exercises for the legs are lunges. They work all the muscles in the legs and can even be a good stretch for the groin when performed correctly. Do these in even sets to work the legs equally and use an 8 to 10 rep range, or choose a distance and set to lunging.
- Set a water pacing – A popular tool used in Army basic training is a thin piece of paracord with beads attached. As you ingest a canteen, about a liter of water, you move the bead to the opposite end of the rope. This gives you an idea of how much you have drunk and how much you have left. Keeping a check could save your life.
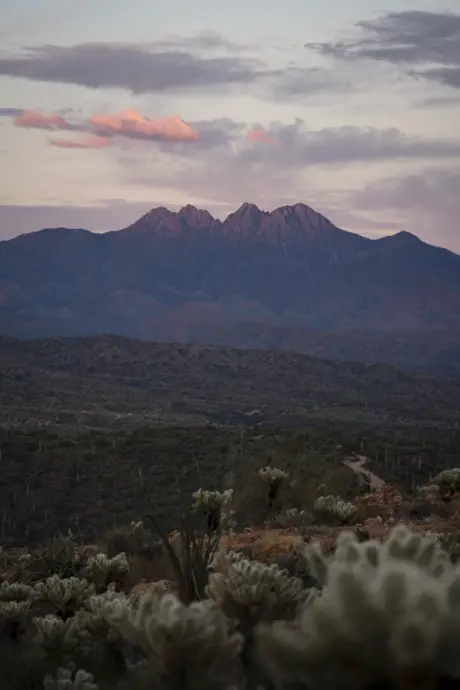
Brown’s Peaks Isn’t a Trail for the Young or Inexperienced.
Four Peaks is a famous trail outside of Phoenix that is another hike that shouldn’t be underestimated. Some would say that counting this as a hiking trail and not a climbing path is something that must be looked into. The scree chute, a near-vertical section of loose rocks and boulders, leads to the mountain’s peak, where you get a perfect view of the desert.
This hike comes with an almost 2000 feet climb in elevation to go along with roughly five and a half miles of out and back trail. It cannot be stressed enough to be prepared to climb and hike long hills for around ten to twelve hours. Animals and children shouldn’t be taken on the trail. There are extreme obstacles that they might not be able to pass.
The roughest parts of the Brown’s Peak trail are:
- The change in elevation
- Climbing portions
- Scree chute
- Large black bear population
- Hard to access the trailhead
Hiking the Brown’s Creek Trail is A Feat Worthy of a Gold Medal
Brown’s Creek Trail is an excellent example of how short trails can be just as harmful as the long ones. The best way to protect your body against the kind of pounding it will take on this trail is to work with a heavy pack, shoot for 50lbs, and start with smaller hikes. If you have issues climbing, work on pull-ups. They strengthen the back and forearms and aid in climbing.
Scree chute is everything people say it is. The slope meets at an odd angle and is covered with loose rock and earth. It is like trying to wedge yourself into a small hallway and climb your way up to the top. The climb is only about 100 feet, but it will separate the real hikers from the weekenders very quickly.
Some exercises to practice before attempting to hike Brown’s Peak:
- Heavy Peak Lunges – Strengthening the legs is crucial for all the climbing involved in Brown’s Peak. Use a heavy pack or rucksack and do 15 lunges per leg for three or four sets. Try to keep the knee over the big toe as stretching too far can tear ligaments and lead to months of recovery. Not only will it work the muscle but stabilize it as well.
- Pull-ups/Bar hang – The back and forearms will need some serious training before taking on this trail. Being able to grip and hold your body weight, at the top of the movement or not, will be something to focus on. Work the muscles in the hands and forearms by hanging if you can’t do a pull-up. Shoot for time over reps in that situation.
- Standing bent over pack row – When it comes to hiking training, you can’t choose regular exercises like you would in a gym. In place of a dumbbell, use a heavy pack. Bend at the waist and row the hand up to the trunk. Use 10 to 12 repetitions with 3 to 4 sets for a good burn. Remember to contract the muscles at the top.
- Rock climbing – There isn’t a more taxing activity to teach you to climb than getting in some bouldering or rock climbing. Gyms across the country are starting to feature rock-climbing walls with support harnesses and specialized grips. Shoot for time with this exercise as it builds muscle endurance.
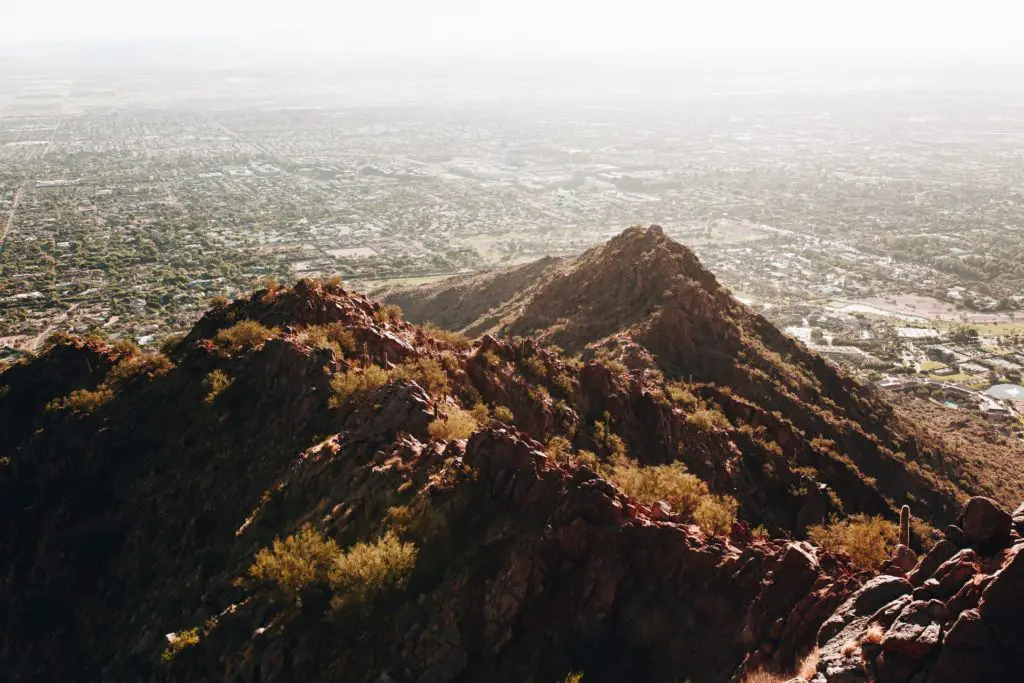
Echo Canyon on Camelback Mountain is a Tough Trail for Anyone
This is the shortest and most intense trail in Arizona. It is only just over a mile long but climbs almost 1300 feet. For people who aren’t used to hiking, this should not be attempted. The climb is anaerobic, meaning that you will work most of the time while trying to catch your breath. The gasping can be a trigger for some to hyperventilate or have an anxiety attack.
The heart rate will hit near its highest levels on this trail. The intense climb is a steep incline that some argue should be attacked on hands and knees. The slope will be enough for hikers to reach their hands out and front for support if they need it. It shouldn’t be understated how steep this hike can be, lots of rock scrambling. Stretch the legs thoroughly before attempting.
The most difficult parts of Echo Canyon are:
- The incline
- Trail vanishes in certain areas
- Rocks litter the trail
- Intimidating railway section
Climbing Echo Canyon is a Feat That Anyone Would Consider Phenomenal
Preparing to hit this trail will take all the hiking and climbing skills that you can muster. The thing to concentrate on is maintaining a steady breath while on the climb. The climb’s intensity will jack the heart rate up and send the hiker on a collision course with dehydration or heat exhaustion. Wear a heart monitor to keep track of any extreme changes. Great shoes with excellent tread cannot be stressed enough as you will have to scramble up rocks.
While it is just under a mile and a quarter Echo Canyon has one of the most challenging half miles in the entire state. Other parts of the trail meet the standard for a typical hike, and there’s also the rail section, which forces you to maneuver around and through a series of railroad tracks and ties. These ties are a well-known spot for injuries and rescues.
A few exercises to keep in mind when training for Echo Canyon are:
- Mountain climbers – Mountain climbers are an old bodyweight exercise used in military training to work the legs in a small space. Begin in the push-up position and alternate, pumping the knees into the chest. Shoot for 15 repetitions, but ten should be enough to get the legs good and fired up. These are intense and should be done in moderation.
- Sandbag cleans – The core muscles are going to take a pretty severe beating on Echo Canyon. Being able to keep your pack upright and move forward is critical for this short hike. Take a sandbag and grab it on both ends. Sling the bag onto your shoulder before throwing it off behind you. Take your time stooping and moving the bag but try and move with an explosion during the transfers. Try and get 20 reps for two sets.
- Overhead lunges – These are a great compound exercise that will build strength throughout the body. Use your pack with all the equipment inside and try to make it as uniform as possible. If it moves around much, it will be hard to wield. Try for 8 to 10 reps and 4 or 5 sets to build some admirable body strength.
Conclusion
Arizona has one of the most diverse and beautiful landscapes of any state in the US. We have an array of hiking grounds that range from long flat trips to near-vertical climbs. Some trails can lead to impressive waterfalls, while others will give you unobstructed views of almost a quarter of the state. Don’t take in these sites alone. Always hike with a partner or group.
While these locations are beautiful and have established routes and trails, they are still some of the most dangerous places for hikers. The weather and terrain can be punishing for those who aren’t well prepared physically or well equipped, and you could face a life-threatening situation. If planning on hiking, any of these trails bring more than enough water for the party. What is the hardest hike you’ve ever done here in Arizona? Let us know!